Django的安装使用
Django 安装
在pycharm里新建项目,在虚拟环境中下载Django包:
安装之后可以通过以下指令打印Django的版本
1
| python -m django --version
|
若终端打印出版本号说明Django安装成功
创建Django项目
打开终端并输入以下命令:
1
| django-admin startproject demo .
|
即可在本目录下创建项目名为demo的Django项目(无外层容器)
终端先进入demo目录下再输入启动命令:
1
2
| cd ./demo
python manage.py runserver
|
若成功运行Django服务器,说明Django项目创建成功。
创建Django的一个App
Django 中的App可理解为网站的某一应用功能,而这种应用功能可以应用独立的表结构、函数、HTML模板等等。一般网站只需一个APP即可
在终端输入以下命令创建App:
1
| python manage.py startapp web
|
就可以创建一个名为web的App。
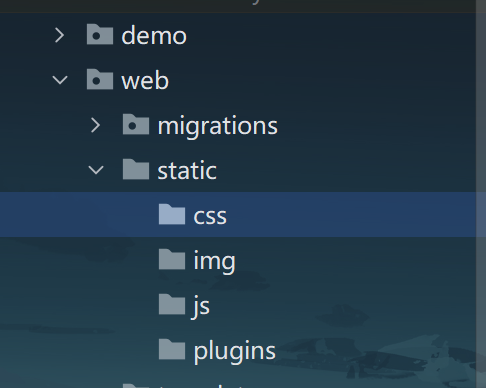
Django项目结构说明
使用tree for windows工具可打印目录树,命令与说明如下
1
2
3
4
5
6
7
8
9
10
11
12
13
14
15
16
17
18
19
20
21
| $ tree HelloDjango -I ".venv|*.md|__pycache__"
HelloDjango
|-- db.sqlite3
|-- demo
| |-- __init__.py
| |-- asgi.py # 异步网络请求处理
| |-- settings.py # 项目配置
| |-- urls.py # url处理
| `-- wsgi.py # 同步网络请求处理
|-- manage.py # 提供命令行工具
|-- requirements.txt
`-- web # 我们创建的第一个app目录
|-- __init__.py
|-- admin.py # Django自带的admin后台管理
|-- apps.py # app启动类
|-- migrations # 数据库字段变更记录
| `-- __init__.py
|-- models.py # 数据库操作
|-- tests.py # 单元测试
`-- views.py # 视图处理
|
视图入门篇
编写第一个视图
在settings.py注册我们的app:
1
2
3
4
5
6
7
8
9
10
|
INSTALLED_APPS = [
'django.contrib.admin',
'django.contrib.auth',
'django.contrib.contenttypes',
'django.contrib.sessions',
'django.contrib.messages',
'django.contrib.staticfiles',
'app.apps.AppConfig'
]
|
编写URL和视图函数的对应关系(两种方法)
1
2
3
4
5
6
7
|
from django.urls import path
from web import views
urlpatterns = [
path("/app/index/", views.index)
]
|
或者在应用下配置url
1
2
3
4
5
6
7
|
from django.urls import path
from . import views
urlpatterns = [
path("index/", views.index)
]
|
1
2
3
4
5
6
|
from django.urls import path, include
urlpatterns = [
path("app/", include("web.urls"))
]
|
编写视图函数
1
2
3
4
5
6
|
from django.shortcuts import HttpResponse
def index(request):
return HttpResponse("Hello Django")
|
之后启动项目即可访问localhost:8000/app/index/路径。
模板&静态文件
配置好url和视图函数关系后,使用模板开启SSR应用:
创建相关视图函数:
1
2
3
4
5
|
from django.shortcuts import render
def page01(request):
return render(request, render("page01.html"))
|
编写html模板(模板文件放在web > templates 或 demo > templates下):
1
2
3
4
5
6
7
8
9
10
11
12
13
| # web > templates > page01.html
<!DOCTYPE html>
<html lang="en">
<head>
<meta charset="UTF-8">
<title>Page01</title>
<link rel="stylesheet" href="/static/css/style.css">
</head>
<body>
<h1 style="color: red">Welcome to Page01</h1>
</body>
</html>
|
引入静态文件(静态文件放在与templates同级的static目录下)
值得一提的是,Django中建议使用{% load static %}方法来引入静态文件:
1
2
3
4
5
6
7
8
9
10
11
12
13
14
| {% load static %}
<!doctype html>
<html lang="en">
<head>
<meta charset="UTF-8">
<meta name="viewport" content="width=device-width, user-scalable=no, initial-scale=1.0, maximum-scale=1.0, minimum-scale=1.0">
<meta http-equiv="X-UA-Compatible" content="ie=edge">
<title>Document</title>
<link rel="stylesheet" href="{% static 'css/style.css' %}">
</head>
<body>
<script src="{% static 'js/main.js' %}"></script>
</body>
</html>
|
其中static路径在setting.py下可配置
模板语法
1
2
3
4
5
6
7
8
9
|
from django.shortcuts import render
def templates(request):
title = "Template Programmar"
info = {"name": "DopamineNone", "date": "2024.1.1"}
content = ["html 占位符", "render 传参", "列表参数", "字典参数","循环渲染"]
return render(request, "templates.html", { "title": title, "list": content, "dict": info})
|
1
2
3
4
5
6
7
8
9
10
11
12
13
14
15
16
17
18
19
20
21
22
23
24
25
26
27
28
29
30
31
32
33
34
35
36
37
38
39
40
41
42
43
44
45
46
| <!DOCTYPE html>
<html lang="en">
<head>
<meta charset="UTF-8">
<title>Template Programmar</title>
</head>
<body>
<h1>{{ title }}</h1>
<ol>
<li>{{ list }}</li>
<li>{{ list.0 }}</li>
</ol>
<ol>
{% for item in list %}
<li>{{ item }}</li>
{% endfor %}
</ol>
<ol>
<li>{{ dict }}</li>
<li>{{ dict.name }}</li>
<li>{{ dict.date }}</li>
</ol>
<ol>
{% for key, val in dict.items %}
<li>{{ key }} : {{ val }}</li>
{% endfor %}
</ol>
<ol>
{% if title == "Template Programmar"%}
<h2>best!</h2>
{% elif title == "Nothing" %}
<h2>bad</h2>
{% else %}
<h2>worst</h2>
{% endif %}
</ol>
</body>
</html>
|
模板的继承
为了减少重复的html模板代码,提高模板复用率,我们可以使用模板的继承(类似Vue中的插槽)
1
2
3
4
5
6
7
8
9
10
11
12
13
14
15
16
17
18
19
20
21
22
23
24
25
26
27
28
29
30
|
<!doctype html>
<html lang="en">
<head>
<meta charset="UTF-8">
<meta name="viewport" content="width=device-width, user-scalable=no, initial-scale=1.0, maximum-scale=1.0, minimum-scale=1.0">
<meta http-equiv="X-UA-Compatible" content="ie=edge">
<title>Layout</title>
</head>
<body>
<header>
<div class="logo">
<i class="..."></i>
<span></span>
</div>
<nav>
<a href=""></a>
<a href=""></a>
<a href=""></a>
<a href=""></a>
</nav>
</header>
<main>
{% block content %}{% endblock %}
</main>
<footer>
....
</footer>
</body>
</html>
|
在其他页面,我们只需写:
1
2
3
4
5
|
{% block content %}
<h1>Page Home</h1>
...
{% endblock %}
|
这样我们就不必每个html都写基础的布局,只关心当前页面的主要内容即可
重定向
1
2
3
4
5
| from django.shortcuts import redirect
def baidu(request):
return redirect("https://www.baidu.com/")
|
获取请求参数
假设用户有这么一个表单
1
2
3
4
5
6
| <form method="post" action="/app/requests/">
{% csrf_token %}
<input type="text" name="username" />
<input type="password" name="pwd" />
<input type="submit" value="提交" />
</form>
|
我们处理请求参数可以用request.POST.get("parameter")
1
2
3
4
5
6
7
8
|
from django.shortcuts import render
def temp_request(request):
print(request.POST)
name = request.POST.get("username")
pwd = request.POST.get("pwd")
return render(request, "request.html", {"name": name, "pwd": pwd})
|
模型入门篇
Django 自带SQLite3,我们能通过Django的orm框架操作数据库
创建第一个数据库表
首先我们得写出模型:
1
2
3
4
5
6
7
8
9
10
11
12
13
14
15
16
17
18
19
20
21
22
23
24
25
| from django.db import models
"""
类名 -- 表名
属性名 -- 字段名
"""
class Question(models.Model):
question_text = models.CharField(max_length=200)
pub_date = models.DateTimeField("date published")
def __str__(self):
return self.question_text
class Choice(models.Model):
question = models.ForeignKey(Question, on_delete=models.CASCADE)
choice_text = models.CharField(max_length=200)
votes = models.IntegerField(default=0)
def __str__(self):
return self.choice_text
|
其次我们需要生成迁移文件(可理解为生成响应的SQL命令):
1
| python manage.py makemigrations
|
最后我们执行未执行的迁移(执行模型对应的SQL命令):
1
| python manage.py migrate
|
表就创建成功
数据表的增删改查
1
2
3
4
5
6
7
8
9
10
11
12
13
14
15
16
17
18
| from web import models
models.Question.objects.create(question_text="What the hell?")
table = models.Question.objects.all()
for item in table:
print(item.question_text, " ", item.pub_date)
matched_list = models.Question.objects.filter(id=1)
matched_el = models.Question.objects.filter(id=1).first()
models.Question.objects.filter(id=2).delete()
models.Question.objects.filter(id=1).update(question_text="What the hell?")
|
学到这里,就可以用Django写出完整的web应用了。
 微信
微信 支付宝
支付宝